Admin Setup
After installation, configure AiDone from the admin panel.
1) General settings
Go to Admin -> System Setting:
- System name and company name
- Email address and phone
- Timezone
- Default language and currency
2) AI settings
Go to:
Admin -> AI Providersto add provider keys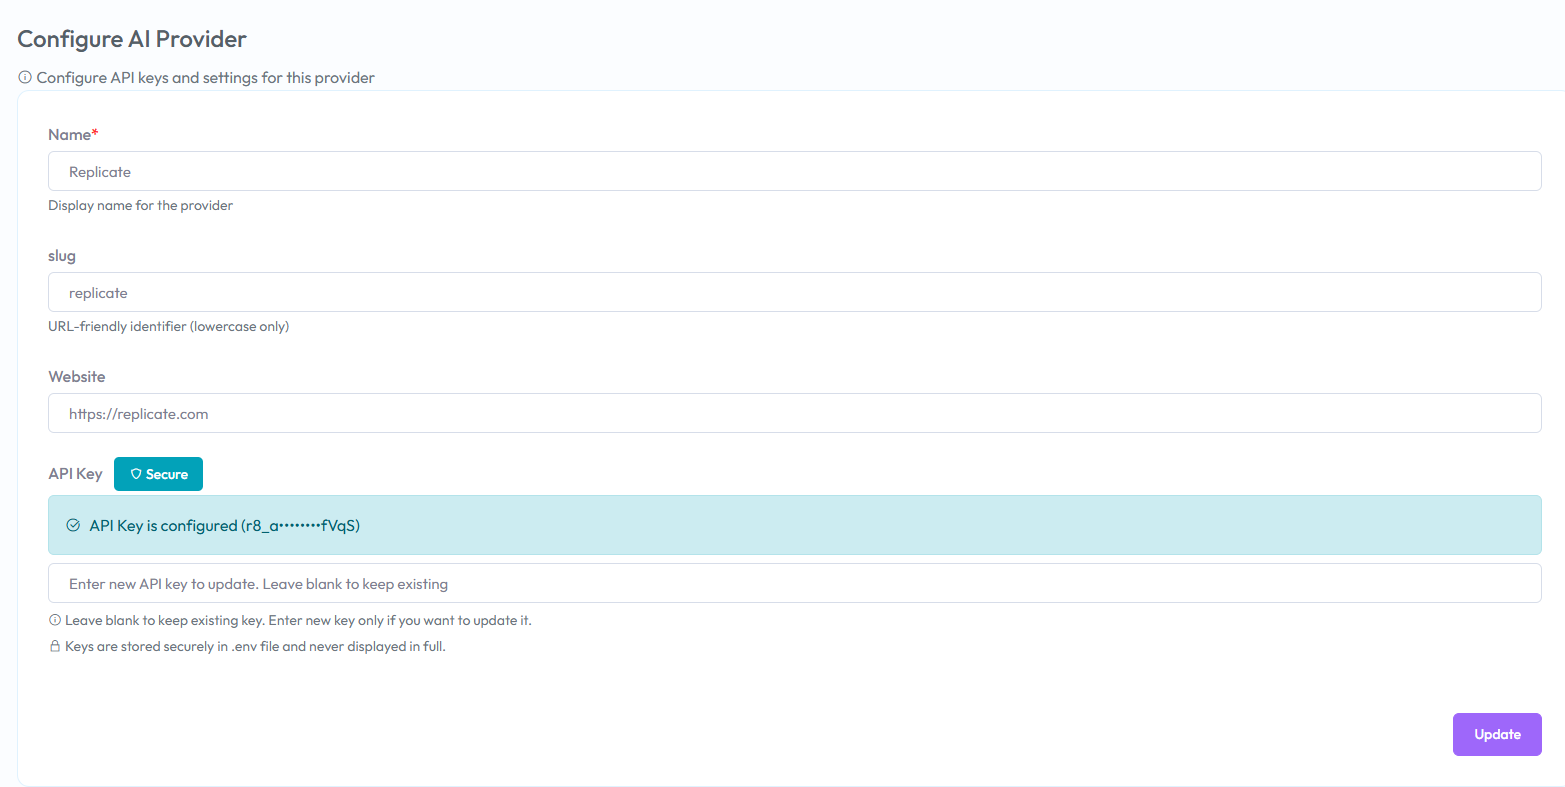
Admin -> AI Modelsto enable models and set credits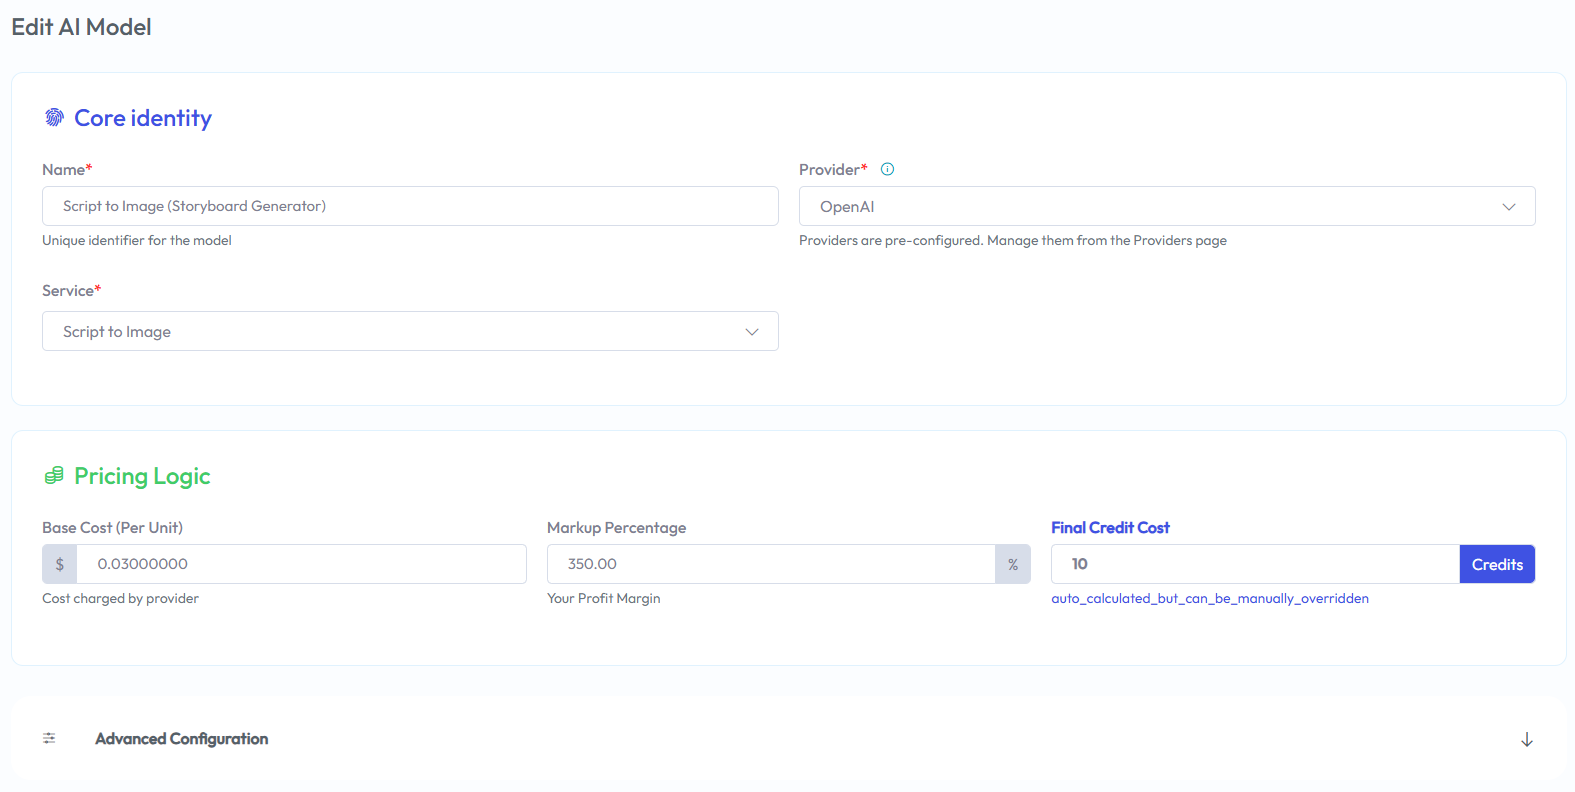
Admin -> AI Servicesif you want to update service labels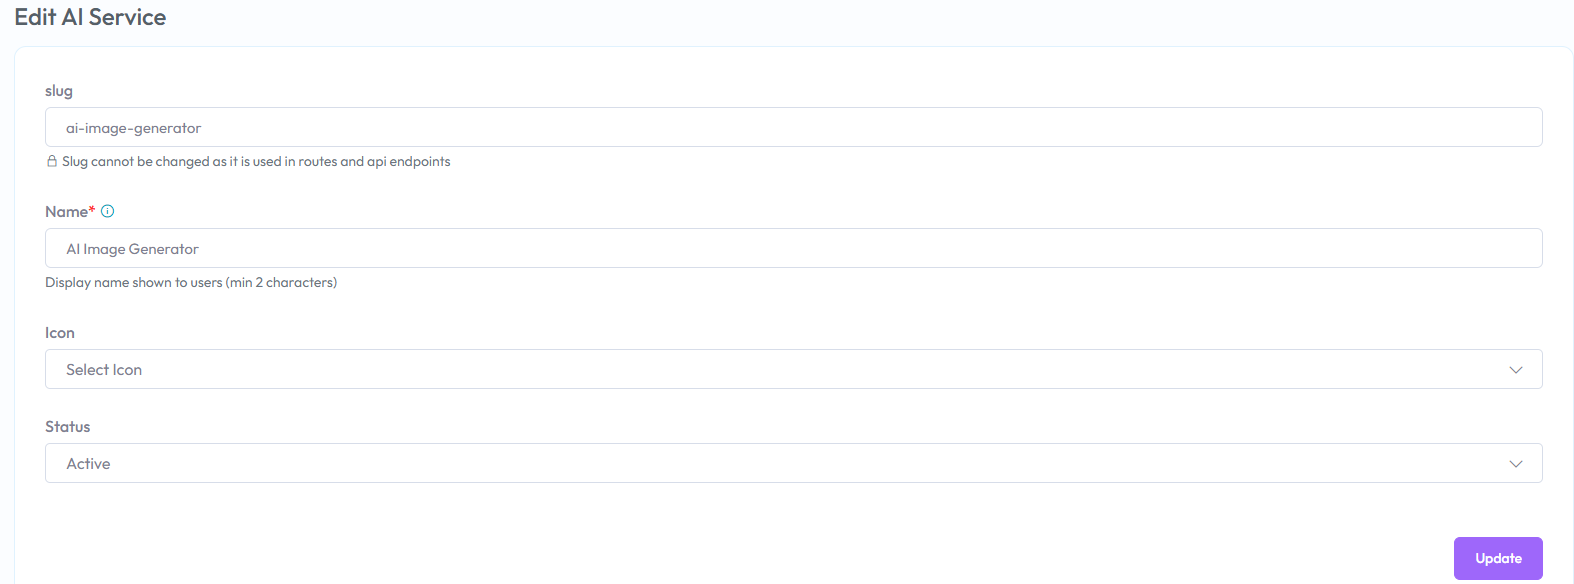
3) Website content
Go to Admin -> Website Setting:
- Home page sections
- Menus and footer
- SEO and tracking (Google, Facebook pixel)
- Default signup credits (Theme Options)
4) Email
Go to Admin -> Email:
- Configure SMTP or another mail driver
- Send a test email to confirm delivery
5) Payment gateways
Go to Admin -> Payment Gateway and enable the gateways you need. Configure each gateway key and test it with a small amount.
6) Storage
Go to Admin -> Storage Setting:
- Choose local, S3, Wasabi, or DigitalOcean
- Save and test by generating an image
7) Staff and roles
Go to Admin -> Staff:
- Create staff accounts
- Assign roles and permissions
8) Paid users list
Go to Admin -> Paid Subscribers to see all users with completed payments.
9) Queue worker
AI jobs run in the background. Make sure a queue worker is running.
- Set
QUEUE_CONNECTION=databaseorredisin.env - If you use
database, run migrations so thejobstable exists (php artisan migrate) - Production: keep a worker running 24/7 (hosting queue UI, Supervisor, systemd, etc.)
Quick test (manual)
From the project root:
php artisan queue:work
Stop with Ctrl+C. This is fine for development only.
Supervisor (Linux production)
Supervisor restarts the worker if it crashes and starts it again after a server reboot.
- Install Supervisor (example on Ubuntu/Debian):
sudo apt update && sudo apt install -y supervisor
- Create a program file (adjust paths and user to match your server):
/etc/supervisor/conf.d/aidone-queue.conf
[program:aidone-queue]
process_name=%(program_name)s_%(process_num)02d
command=php /var/www/aidone/artisan queue:work database --sleep=3 --tries=3 --max-time=3600
autostart=true
autorestart=true
stopasgroup=true
killasgroup=true
user=www-data
numprocs=1
redirect_stderr=true
stdout_logfile=/var/www/aidone/storage/logs/queue-worker.log
stopwaitsecs=3600
Notes:
- Replace
/var/www/aidonewith your real project path (whereartisanlives). databaseis the queue connection name; if you useredis, change the command toqueue:work redis ....user=www-datashould be the same user your web server uses to read the project (sometimesnginx,apache, or a deploy user).
- Reload Supervisor:
sudo supervisorctl reread
sudo supervisorctl update
sudo supervisorctl start aidone-queue:*
- Check status:
sudo supervisorctl status aidone-queue:*
You should see RUNNING.
After each deployment
Laravel workers do not reload new code automatically. After you deploy new PHP code, run:
php artisan queue:restart
Supervisor will restart the worker process and pick up the changes.
Windows / local (Herd, XAMPP)
Supervisor is Linux-oriented. On Windows, run php artisan queue:work in a terminal when testing, or use your host’s equivalent (some panels offer a “queue worker” service).